Biological Products:
Bioaugmentation products for Wastewater applications in Papermills, Refineries, Chemical, Tanneries, Municipalities, Textiles, Steel, Agriculture, Animal feedlot, Gun Powder plant, Food and Beverage- Dairy Products, Orange Juice factory, Wineries, Cookie factory, Vegetable processing plant, Meat packing, Barbecue Restaurant, Aquaculture, Ornamental Ponds with algae , CAFO, Nursing homes, Military, Campgrounds, Universities, Regulatory agencies, River and Lake remediation
Lab Services:
Filamentous Identification Lab Service. One reason to identify filaments is to determine the filaments characteristics and then determine the type present. If the type is found out, a root cause can usually be associated with a particular filament. If the cause is known, then a correction can be made to alleviate problems. Chlorination is only a quick fix. Without process changes, filaments will grow back after chlorination. Wastewater Biomass Analyses and Cooling Tower Analyses also available
Training Materials:
Training is an integral part of any job. Not everyone is at the same level of training. Many people want beginning concepts and basics. Some need technical information or troubleshooting. Some want equipment, technology or process information. We have developed a full set of Basic training, Advanced training, Filamentous Identification the Easy Way as well as custom training CD's Manuals. We also provide hands-on training classes and soon will have an Online "E-University".
Audits and Consulting:
At Environmental Leverage® Inc., we have a team of experienced individuals who come into your plant with a fresh pair of eyes. The system is checked from influent to effluent. System optimization, equipment efficiency and operational excellence are key components explored. Key Benefits Equipment efficiency Total Cost of Operation reductions Reliability and safety An onsite audit is conducted to examine system parameters, process controls, and current monitor and control procedures. A physical walk-through is conducted, process flow diagrams are examined, previous design criteria are examined and current standard operating procedures are evaluated along with data logs.
|
Bacteria and Filament StainingLatest News!
What's New!
We have just added "Virtual Audits" to our capabilities. Check out our new Services. We are in the process of developing new courses for our ""Online E-University" in order to meet the needs of our global customers that cannot travel to our public classes.Visit our new website www.WastewaterElearning.com/Elearning
Stains, what to use and where to find them: There are many companies that make stains for Microscopic work. We are constantly asked what are the most common used for wastewater. Below are just some examples. Feel free to check your local supplier or check other sources off the Internet. These are just used as a guideline to some of the easy types of stains to use. Gram Stains and Neisser stains are more difficult to use and are for use with filamentous work.
Other great sources: VWR-www.VWR.com
USA Bluebook -www.USABluebook.com
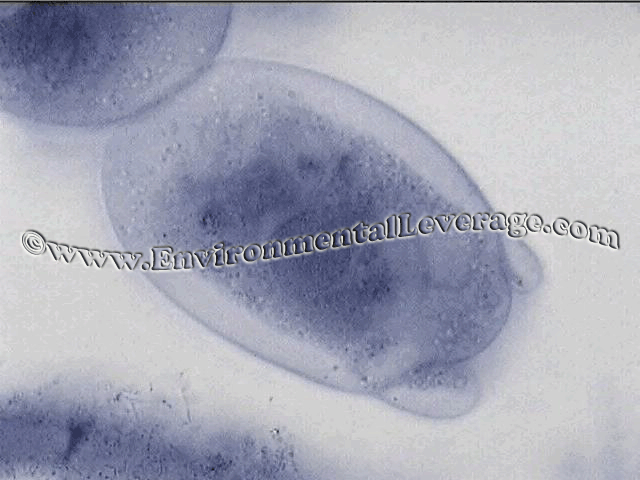
Lactophenol Cotton Blue Stain is formulated with lactophenol, which serves as a mounting fluid, and cotton blue. Organisms suspended in the stain are killed due to the presence of phenol. The high concentration of the phenol deactivates lytic cellular enzymes thus the cells do not lyse. Cotton blue is an acid dye that stains the chitin present in the cell walls of fungi.
REAGENT FORMULA Ingredients per liter:*
* Adjusted and/or supplemented as required to meet performance criteria.
Preparation of Lactophenol Cotton Blue Slide Mounts Lactophenol Cotton Blue (LPCB) wet mount preparation is the most widely used method of staining and observing fungi and is simple to prepare. It can be used to also look at filaments and higher life forms with microscopic work. Just remember, the stain will slow down and or cause the higher life forms to die. This is great for taking photomicrographs, but not for a wastewater biomass analyses. Use a normal wet mount first for higher life form counts.
Procedure for staining:
India Ink stain procedure is the exact same procedure, one drop of
sample, one drop of India Ink on top of sample, cover and examine. India Ink is basically carbon black particles. They block out all the light except the polysaccharide coating that the bacteria produce. The light that shows through in the microscope is a measure of how much polysaccharide coating present.
If high, it can indicate a lack of nutrients or a recent shock to the system. If there are tons of higher life forms present, you can probably rule out a shock and start to check your nutrient levels.
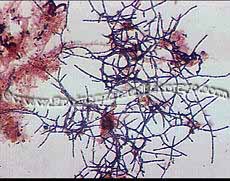
GRAM STAIN USE: This staining procedure differentiates bacteria into gram positive and negative based on their ability to retain the primary dye (crystal violet) or lose the primary dye and accept the color of the counter stain (safranin). Gram positive bacteria produces a blue/purple color with this staining procedure while gram negative ones are red in color.
REAGENTS/STORAGE: Reagent kits manufactured by BBL and Difco can be purchased from a local scientific supply house and contains four reagent bottles: Crystal violet -- the primary dye Gram’s iodine -- the complexing agent Alcohol -- the decolorizer Safranin -- the counter stain The crystal violet and safranin can be stored indefinitely while iodine
has to be replaced every 6-9 months. Storing in the dark will help to extend
the life of the iodine solution.
PROCEDURE: 1) Place a drop of the sample on the glass slide using a disposable Pasteur pipette and carefully spread the drop to form a thin film on the slide. 2) Allow the slide to air dry. Do not heat fix which may cause distortion of the filaments. 3) Flood the specimen with crystal violet. Leave it on for 30 seconds. 4) Tip the slide to drain off crystal violet and flood with gram’s iodine. Leave it on for 1 minute. 5) Drain off the iodine solution and rinse with the decolorizer to remove the excess purple color. Then let the slide sit for 10 seconds with alcohol in it and rinse the slide again with more decolorizer. 6) Wash gently with tap water for 5 seconds approximately to stop the action of the decolorizer. 7) Flood with safranin and leave it on the specimen for 1 minute. 8) Wash the slide very lightly with water and let it air dry. 9) Observe and examine under the microscope using the bright field oil immersion.
RESULTS: Gram positive bacteria appear blue/purple in color while gram negative bacteria are red. Since variation in gram reaction can occur due to the age of the culture. It is important to stain the samples within 24-48 hours of sampling. Types of ( i.e. chemical vs. a papermill) can also effect the staining abilities of the filamentous bacteria. Polysaccharide coating and sheaths also effect coloration.
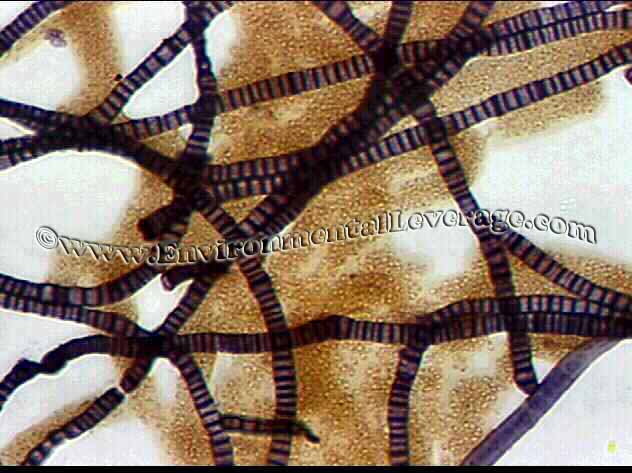
USE: This staining procedure is most useful in checking for filaments that are coiled deep within floc. It is based on the dye retention mechanism of basic materials in the cell walls or granules of certain bacteria. It is very useful for staining of tetrad clusters seen on the left and Neisser negative filaments such as Type 0092 and N. Limicola.
REAGENTS/PREPARATION: The staining procedure involves the use of a working solution and counter stain. The working solution is prepared by mixing two parts of solution 1 and one part of solution 2. Solution 1 and 2 have the following composition.
SOLUTION 1SOLUTION 2 Methylene Blue 0.1 g Crystal Violet 0.33 g 95% Alcohol 5.0 ml 95% Alcohol 10.0 ml Glacial Acetic Acid 5.0 ml Distilled Water 100.0 ml Distilled Water 100.0 ml The counter stain consists of 0.333 grams of Bismarck Brown dissolved in
100 ml of distilled water.
PROCEDURE: 1) Prepare smears as in gram stain method and air dry. 2) Stain the specimen for 15 seconds with the working solution. Rinse briefly and shake off the excess water. 3) Stain for 1 minute with the Bismarck Brown counter stain. Thoroughly blot off the excess stain; do not rinse. 4) Let it dry and examine under the microscope with oil immersion and direct illumination.
RESULTS: Blue/gray cells (sometimes purple in appearance) are considered positive and yellow/brown cells negative for this staining procedure. Types of environments that the filamentous bacteria are in can effect the staining abilities; Papermills, CPI, refineries, sheaths and polysaccharide coatings also.
How do I know if I have stained the filaments correctly or have identified the correct filament? Remember, that even though it appears to be 2 dimensional to you, it is in reality a 3 dimensional slide. When the filaments are suspended in the water and are drying on the slide, some of the cells or sheath may get twisted while drying and thus create weird shapes. That is common, so do not worry that you have identified the filament incorrectly or that there is more than one filament type present.
Be careful not to get to worried that the cells on the filament do not
look exactly alike. They can change and look slightly different in the exact
same sample depending upon their growth stage.
Lab Testing and Troubleshooting Newsletter
Start your way now to a cleaner, brighter effluent with fewer hassles in
your waste treatment plant. Click on the various links below.
1 Filamentous bulking vs. Zoogleal bulking 2 Wastewater Biomass Analyses Brochure 3 Additional training Materials 5 Wastewater Biomass Analysis Brochure - Printable Pdf Link 7 More information on troubleshooting 8 Wastewater Training Materials Brochure - Printable Pdf Link 9 Our most comprehensive training CD ever! This amazing CD makes Identification of filaments Easy & Simple. While combining treatment plant processing & troubleshooting.
11 A full set of Stained Filaments Microscope Slide Set - Printable Pdf Link
|


 NEISSER STAIN